Applications
Set Up Applications
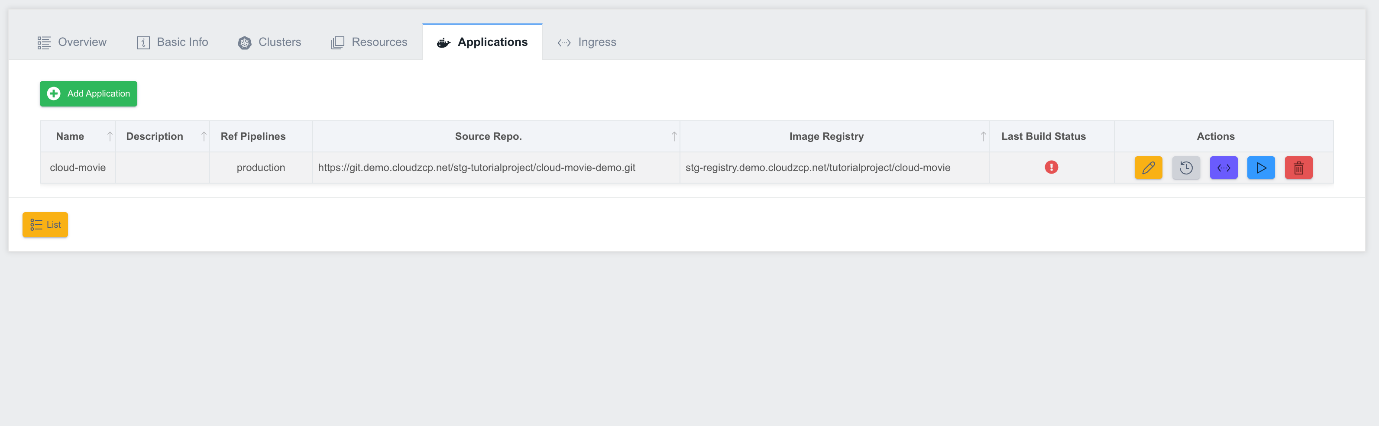
To manage the list of applications to include in the Deployment Group, click the Applications tab at the top of the screen
-
Name: Application name.
-
Description: Application description.
-
Ref Pipelines: A list of pipelines for applications included in the Deployment Group.
-
Source Repo: The address of the application's source repository.
-
Image Registry: The address of the application's build image.
-
Last Build Status: The last build status of the application.
-
Actions: A collection of function buttons that are responsible for the following functions (from left to right)

- Detail: Edit Application
- History: Get Application Deploy History
- Configuration: Application Configuration settings
- Deploy: Application Deploy
- Delete: Delete the application
Add an Application
To add an application, click the Add Application button in the upper left corner of the screen. The Add Application pop-up screen is displayed.
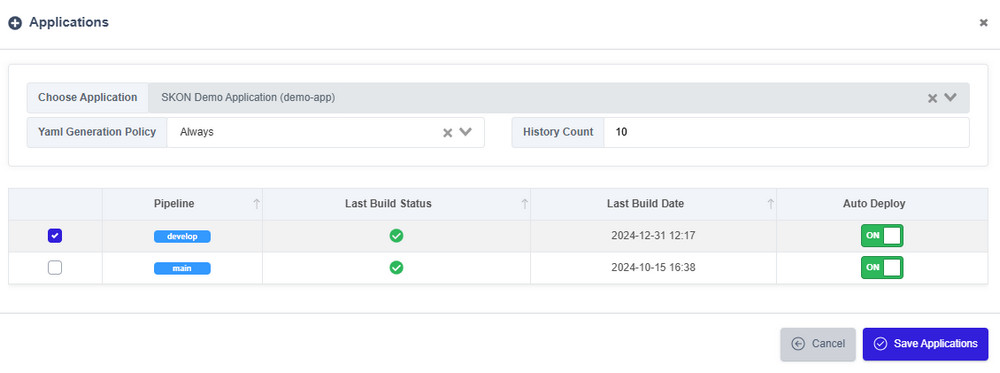
- In the Choose Application section at the top of the screen, select the application you want to add.
- In the list of pipelines in the viewed application, select the checkbox of the pipeline you want to add, and set whether to auto-deploy. If Auto Deploy is enabled, deployment will be performed automatically whenever a build of that pipeline is successful.
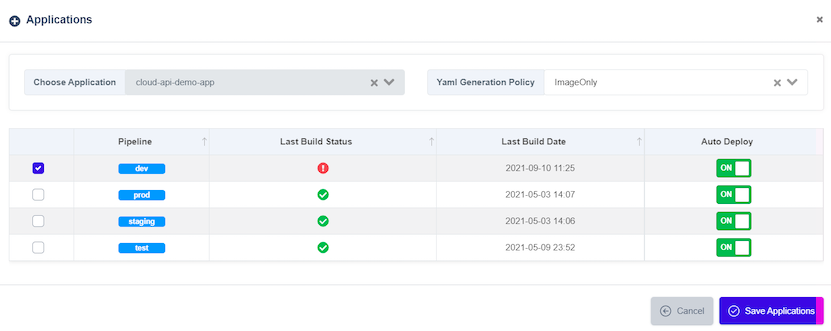
- Select YAML Generation Policy at the top of the screen. If YAML Generation Policy is set to
Always, the entire Deployment and Service YAML files are generated each time you deploy, overwriting all values stored on the Git server. If set toImage Only, only the image path of the first container in the Deployment YAML is updated and saved. - Enter the number of History Count: This field specifies the number of previous deployment versions to retain in your deployment history.
When you are finished selecting the pipeline for your application, click the Add Applications button at the bottom of the screen. The Add Applications pop-up screen closes and the applications you added to the list are viewed.
Modifying applications
Edit the pipeline for a registered application. Click the Detail button in the Application's Actions section. The Edit application pop-up screen opens, and the application's details are viewed.
Set Application Properties
Click the Configuration button in the Application's Actions section to view the configuration settings in a pop-up screen. Since Configuration is set per cluster, the screen consists of cluster-specific Deployment Spec and Advanced (Health Check, Environments, Volumes, Tolerations, Affinities) settings. If there is a previously saved configuration, a popup screen opens with the lookup completed.
Set the Deployment Spec for the application:
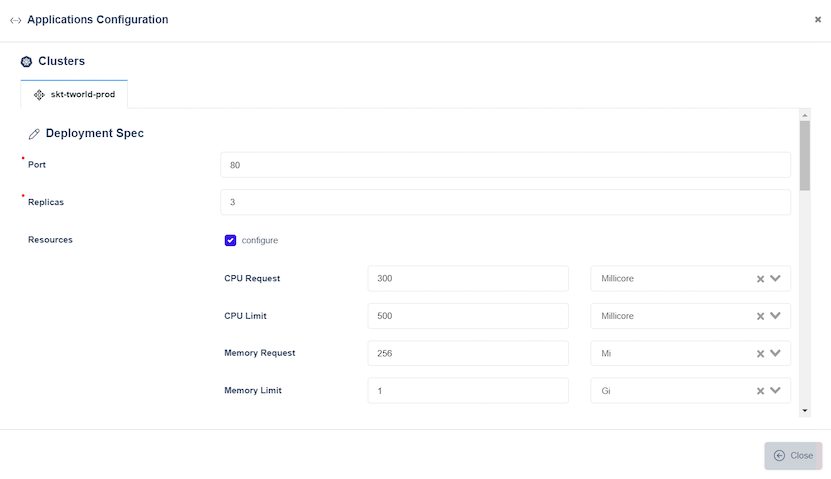
- Select cluster from the tabs at the top of the screen.
- On the Deployment Spec screen, enter the values and click the Save button at the bottom of the screen to complete the save.
Set the Advanced items for the application:

- Health Check: Defines the application's readiness probe and liveness probe specifications.
- Environments: Register environment variables for the application, either directly as key-value pairs or by referencing keys from registered ConfigMaps or Secrets.
- Env References: Register environment references for the application by linking to all registered ConfigMaps or Secrets.
- Volumes: Configure the Volume to be used by the application.
- Tolerations: Specify the Toleration for the application.
- Affinities: Set node or pod Affinity rules.
Deploying applications
Deploy the application to the cluster. Click the Deploy button in the application's Actions section. The build history of the application is displayed in a pop-up screen.
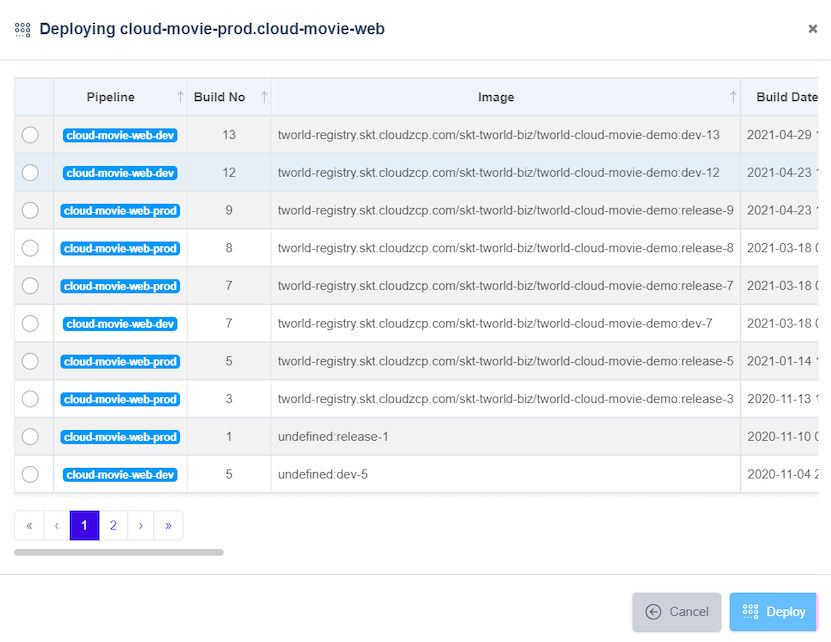
Select the Build No of the pipeline you want to deploy, then click the Deploy button at the bottom of the screen to proceed.